Make fire to cook, light in the darkness, heat in the cold you just must have fire. While I have previously discussed the heated lawnmower blades as a fire lighter, for many they are not easy to use, especially when so many simple alternatives are available. Certainly the pair of iron strikers will last much longer off grid, often fire is needed fast and easy not eventually. Lets look at some commonly available cigarette lighters and their features, pros and cons.
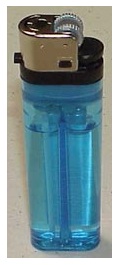
Typical low pressure disposable plastic lighter
Disposable plastic type lighter.
Fuel : pressurized butane
Refillable: usually no, sometimes yes check for valve.
Fuel life span: depends on use
Ignition system: usually striker wheel and flint, sometimes piezoelectric
Ignition life span: striker wheel good, piezos can often fail
Material: Mostly plastic
Weight: low
Cost: low $1-2
Main advantage: cheap readily available.
Main disadvantage: not refillable usually
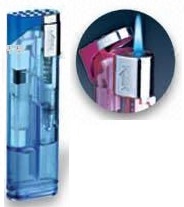
Typical high pressure piezoelectric butane lighter. Some have an LED light as a optional feature.
High pressure butane type lighter
Fuel: butane at high pressure
Refillable: Sometimes
Fuel life span: Fuel often will leak, 2 weeks at most.
Ignition system: piezoelectric.
Ignition life span: often fails before fuel is gone.
Material: plastic.
Weight: low.
Cost: medium, often gimmick factor in price.
Main advantage: very hot flame, good in windy conditions.
Main disadvantage: very unreliable.
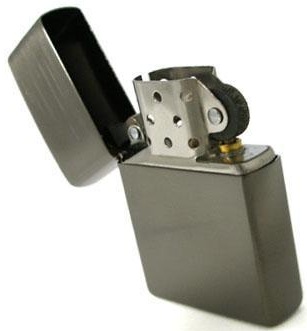
Typical Zippo type lighter. Iconic.
Zippo type lighter
Fuel: volatile liquid hydrocarbons
Refillable: yes
Fuel life span: 2-3 weeks depending on fuel, temperature, and use.
Ignition system: striker wheel and flint
Ignition life span: long 3- 6 months between replacing flints
Material: metal, brass is common
Weight: heavy
Cost: high $30- 50 depending on brand and quality
Main advantages: very robust, big flame, very simple design.
Main disadvantages: heavy, difficult to replace flints, fuel will evaporate quickly.

Typical Imco type lighter. One of the better options.
Imco Triplex type lighter
Fuel: volatile liquid hydrocarbons
Refillable: yes
Fuel life span: long
Ignition system: striker wheel and flint
Ignition life span: medium, uses flints fast.
Material: metal
Weight: medium, not much heavier than plastic lighters
Cost: medium, $20
Main advantage: small and easy to maintain, quite reliable creates large spark, long fuel life
Main disadvantage: uses flints fast, seem complex at first, lots of sliding parts and a spring.
Conclusions:
If you already have a Zippo type or Imco type lighter, keep it. If you can justify $20 or more for a lighter, get one of those two, if not, two or three low pressure lighters. Avoid the high pressure lighters, their special feature is seldom needed and they fail often. If you are deciding on a liquid hydrocarbon fueled lighter remember to have fuel and periodically check the fuel levels.


You must be logged in to post a comment.